Recent Posts
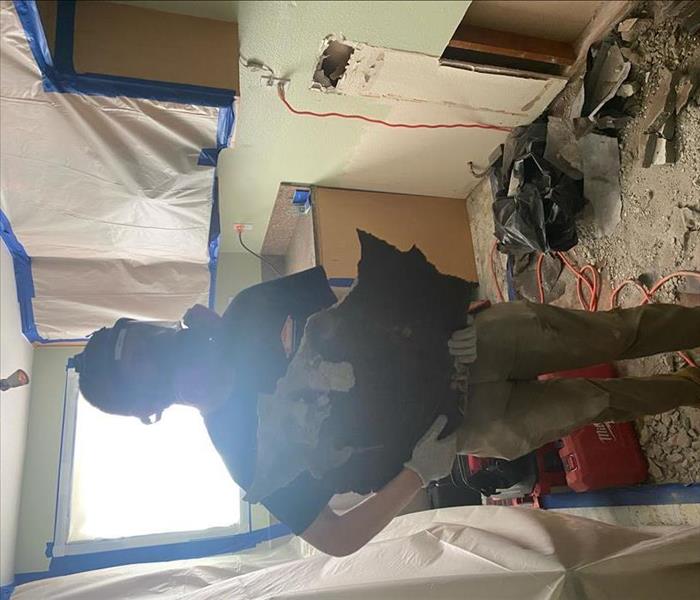
The Different Stages of Fire Damage Restoration
4/17/2024 (Permalink)
 In this blog, we will explore the key stages involved in fire damage remediation and restoration.
When a fire strikes, the aftermath can be overwhelming. Fire damage not only affects the structure of a building but also personal belongings. Fortunately, professional fire damage restoration services, like those offered by SERVPRO®, can help restore your property to its pre-fire condition. Understanding the different stages of fire damage restoration is essential to ensure a successful and comprehensive restoration process. In this blog, we will explore the key stages involved in fire damage remediation and restoration. By familiarizing yourself with these stages, you can better prepare for the restoration process and get your life back on track.
Emergency Response and Inspection
The first stage of fire damage restoration is the emergency response and inspection. As soon as it is safe to do so, contact a professional fire restoration company, such as SERVPRO, for immediate assistance. They will dispatch a team of certified technicians to assess the extent of the fire damage and create an action plan tailored to your specific needs.
During the inspection, professionals will assess structural damage, examine affected areas, and identify the extent of smoke damage to personal belongings. This crucial step allows them to develop an efficient and effective restoration plan.
Water Removal and Drying
Water damage often accompanies fire damage due to firefighting efforts. The next stage involves water removal and drying to prevent secondary damage, such as mold growth. Certified technicians will utilize specialized equipment to extract standing water, dehumidify the area, and initiate the drying process.
Prompt action is crucial during this stage, as it helps minimize further damage and prepares the space for the next steps in the restoration process.
Smoke and Soot Cleanup
Fire damage leaves behind smoke and soot that can permeate every surface of a building, including personal belongings. Smoke and soot cleanup is an integral part of fire damage restoration. Professionals will employ advanced techniques and equipment to remove smoke residues, clean affected surfaces, and eliminate lingering odors.
This stage involves specialized cleaning methods suitable for specific materials and items. Professionals will meticulously clean and restore personal belongings, including furniture, clothing, upholstery, and electronics.
Structural Repair and Reconstruction
Once the cleanup is complete, the focus shifts to structural repair and reconstruction. This stage involves repairing damaged walls, ceilings, floors, and other structural components. SERVPRO professionals are experienced in handling the restoration of fire-damaged structures, ensuring that repairs are made to safeguard the structural integrity of the building.
Content Restoration and Cleaning
During a fire, personal belongings can suffer smoke damage and require cleaning and restoration. SERVPRO offers comprehensive content restoration services, including document and electronics restoration, art and antique restoration, and delicate item cleaning. This stage ensures that your valuable belongings are restored whenever possible.
Final Inspection and Completion
The final stage of fire damage restoration involves a thorough inspection to ensure everything has been restored to its pre-fire condition. Professionals will review the restoration work, addressing any remaining concerns or touch-ups. Once the final inspection is complete, you can confidently move back into your home or resume business operations.
Fire damage restoration is a complex and multifaceted process that requires professional expertise. Understanding the different stages – emergency response, water removal and drying, smoke and soot cleanup, structural repair, content restoration, and final inspection – helps homeowners and businesses prepare for the restoration journey. Through the expertise of certified technicians at SERVPRO, fire-damaged structures can be restored, personal belongings can be cleaned and restored, and life can gradually return to normal. Trusting the restoration process to professionals ensures a comprehensive and successful fire damage restoration experience.
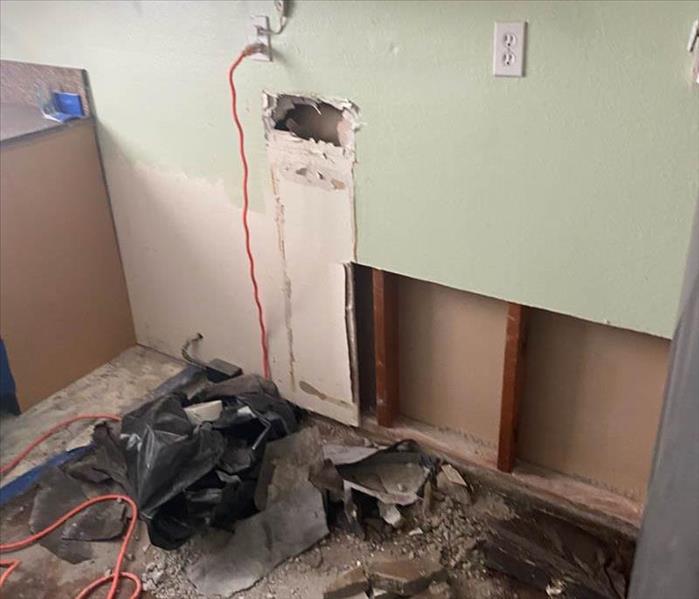
Mold in Your Basement: Causes and Remediation Strategies
3/13/2024 (Permalink)
 In this blog, we will explore why mold may occur in basements and provide tips on how to remediate mold effectively.
Discovering mold in your basement can be a concerning issue. While mold growth poses potential risks to your property, it is important to understand the causes and effective remediation strategies for addressing mold in your basement. In this blog, we will explore why mold may occur in basements and provide tips on how to remediate mold effectively.
Causes of Mold in Basements
Basements are prone to mold growth due to several contributing factors. Understanding these causes can help in preventing mold in the first place. Here are some common causes of mold in basements:
- Moisture Intrusion: Excessive moisture in the form of water leaks or seepage is one of the primary culprits behind mold growth in basements. Leaky pipes, foundation cracks, or floods can introduce moisture into the basement, creating an ideal environment for mold to thrive.
- Poor Ventilation: Inadequate air circulation and ventilation in basements trap moisture, increasing the humidity levels. Higher humidity provides the necessary conditions for mold growth.
- Dampness and Condensation: Basements tend to be cooler than the rest of the house, making them more prone to condensation. When warm air comes into contact with cooler surfaces, such as walls or pipes, condensation can occur, creating a moist environment suitable for mold growth.
Remediation Strategies
If you discover mold in your basement, prompt action is crucial to prevent further damage. Here are some effective remediation strategies to tackle the issue:
- Identify and Fix the Source of Moisture: Start by locating and addressing any sources of moisture intrusion in your basement. Repair pipe leaks, seal foundation cracks, and address any other issues causing moisture to enter your basement. This step is vital to prevent recurring mold growth.
- Improve Ventilation: Enhance the airflow in your basement by using fans or opening windows. Consider installing an exhaust fan or a dehumidifier specifically designed for basements to help reduce humidity levels.
- Remove Mold-Infested Materials: If there are porous materials like carpets, drywall, or insulation that have been extensively affected by mold, it may be necessary to remove and replace them to eliminate mold completely.
- Clean and Disinfect: For mold growth on solid surfaces, use a solution of one part white vinegar to three parts water or a commercial mold cleaner recommended for use in basements. Scrub the affected areas thoroughly, ensuring all visible mold growth is removed.
- Dry Thoroughly: After cleaning, make sure to dry the basement entirely to prevent future mold growth. Use fans, dehumidifiers, and open windows to promote airflow and remove any lingering moisture.
- Consult Professionals: If the mold growth is extensive or if you are unsure about the proper remediation process, consult professionals like SERVPRO® who specialize in mold restoration services. They have the expertise, equipment, and techniques to handle severe cases of mold in basements, ensuring effective remediation.
Understanding the causes and implementing appropriate remediation strategies are vital steps in addressing mold in your basement. By identifying and rectifying the sources of moisture intrusion, improving ventilation, and taking prompt action to remove mold growth, you can restore your basement and prevent further damage. Remember, prevention is key, so regularly inspect your basement for any signs of moisture or mold and address issues promptly to maintain a healthy and mold-free environment.
Under the Weather: Tackling Roof Leaks and Water Damage
2/11/2024 (Permalink)
 A leaky roof is more than a minor inconvenience; it's a gateway for potential water damage.
A leaky roof is more than a minor inconvenience; it's a gateway for potential water damage. Detecting and addressing roof leaks promptly is crucial for preventing extensive damage and costly repairs. In this blog, we explore the importance of regular roof inspections, the common causes of roof leaks, and effective repair strategies to keep your home dry and secure.
The Significance of Roof Inspections
Regular roof inspections are the first line of defense against water damage. They allow homeowners to identify potential issues early, preventing minor leaks from escalating into major problems. Schedule inspections at least twice a year, ideally in the spring and fall, and after severe weather events.
Common Causes of Roof Leaks
Understanding the common culprits behind roof leaks empowers homeowners to address issues promptly. Some prevalent causes include:
- Damaged or Missing Shingles
- Aging Roofing Materials
- Flashing Issues
- Clogged Gutters
Early Detection
Identifying roof leaks in their early stages is crucial. Look for signs such as water stains on ceilings, discolored walls, or peeling paint. During inspections, pay attention to the condition of the roof, checking for loose or damaged shingles, deteriorated flashing, and any other visible issues.
DIY Repairs vs. Professional Assistance
While some homeowners may attempt DIY roof repairs, it's crucial to assess the complexity of the issue. Simple tasks like replacing a few missing shingles may be manageable, but more intricate problems, such as flashing issues or widespread damage, often require professional expertise. Roofing professionals can conduct thorough assessments and provide long-lasting solutions.
Flashing Repairs
Damaged flashing can compromise the integrity of your roof. Professional roofers can assess the condition of flashing and make necessary repairs or replacements to ensure a watertight seal around vulnerable areas. Clogged gutters and downspouts are also a common cause of roof leaks. Regularly clean out debris, ensuring unobstructed water flow.
In cases of sudden roof damage, such as severe storms or fallen branches, it's crucial to address emergency repairs quickly. Tarping or covering damaged areas can provide temporary protection until more extensive repairs can be conducted.
With regular inspections and timely repairs, homeowners can protect their homes against these threats. By staying vigilant, promptly addressing issues, and seeking professional assistance when needed, you ensure that your roof remains a strong protector, keeping your home dry and secure for years to come.
Understanding the Impact of Wind Damage & the Steps to Restoration
1/14/2024 (Permalink)
 Whether it's from a severe storm, tornado, or hurricane, the aftermath of wind damage can be distressing and overwhelming.
Wind damage can wreak havoc on homes and businesses. Whether it's from a severe storm, tornado, or hurricane, the aftermath of wind damage can be distressing and overwhelming. Understanding the implications of wind damage and knowing how to navigate the restoration process is crucial for swift recovery.
The Impact of Wind Damage
1. Roof Damage
Strong winds can uplift or dislodge shingles, cause roof leaks, or even lead to structural compromises. Timely inspection and repair are essential to prevent further water intrusion or structural issues.
2. Structural Compromise
Wind can weaken the structural integrity of buildings, causing damage to walls, windows, and doors. This may compromise the safety and security of the property.
3. Debris and Impact
Flying debris during high winds can cause severe damage to property exteriors, including siding, fences, and landscaping. Impact damage may necessitate repairs or replacements.
Steps to Address Wind Damage
1. Safety First
Prioritize safety. Assess the property for any immediate dangers and avoid entering areas that could pose risks due to structural instability.
2. Documentation
Document the damage by taking photographs or videos. This documentation will assist in insurance claims and help professionals understand the extent of the damage.
3. Temporary Repairs
Take immediate action to prevent further damage. Cover broken windows, tarp tarp-damaged roofs, and secure any exposed areas to mitigate additional harm.
4. Professional Assessment
Contact certified restoration professionals like SERVPRO of Mid-City San Diego to conduct a thorough assessment of the damage. Their expertise is vital in understanding the full scope of the restoration needed.
The Restoration Process
1. Inspection and Assessment
Trained technicians will perform a detailed inspection to identify all areas of damage and develop a comprehensive restoration plan.
2. Water Extraction and Drying
If water intrusion has occurred due to wind damage, professionals will extract standing water and implement drying techniques to prevent further issues like mold growth.
3. Structural Repairs
Repairing damaged structures, roofs, walls, windows, and doors is a priority. This ensures the property's safety and prevents further deterioration.
4. Cleanup and Restoration
Professionals will thoroughly clean debris, restore damaged areas, and return the property to its pre-damage condition.
Importance of Professional Assistance
Seeking professional help for wind damage restoration is crucial. Trained experts possess the skills, equipment, and experience necessary to efficiently restore your property. Their swift response can mitigate further damage and expedite the recovery process.
Wind damage can be a distressing ordeal, but with the right approach and professional assistance, recovery is possible. Prompt action, thorough assessment, and skilled restoration are crucial in mitigating wind damage's aftermath.
At SERVPRO of Mid-City San Diego, our dedicated team is committed to providing efficient wind damage restoration services, helping you restore safety, security, and peace of mind to your property. Contact us for expert assistance in navigating the restoration process and recovering swiftly from wind damage.
Cooking Safely: How to Prevent Kitchen Fires and What to Do If One Occurs
12/20/2023 (Permalink)
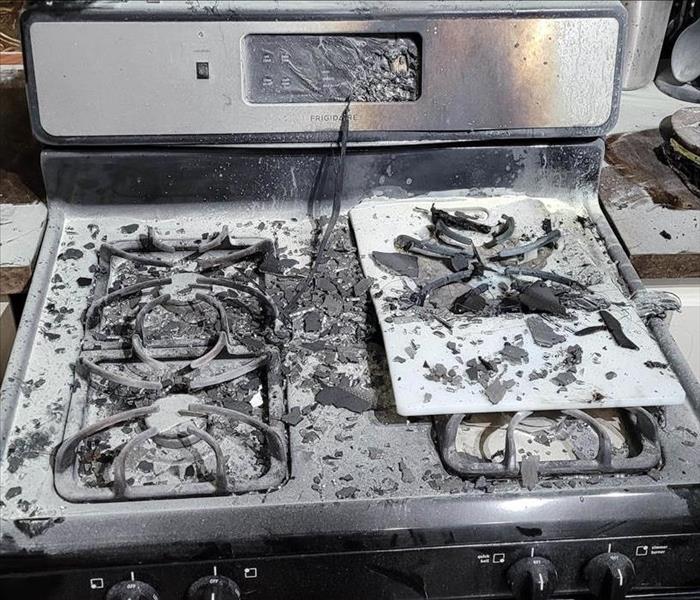 Despite your best efforts, kitchen fires can still happen.
The kitchen is the heart of your home, where delicious meals are prepared, and cherished memories are made. However, it's also a place where fires can happen if safety precautions are overlooked. In this blog, we'll provide valuable tips on preventing kitchen fires and outline the steps to take in case one occurs. By following these guidelines, you can protect your family, property, and peace of mind.
Prevention is Key
Preventing kitchen fires starts with being proactive and vigilant. Here are some essential steps you can take to reduce the risk of fires in your kitchen:
Never Leave Cooking Unattended
The most common cause of kitchen fires is unattended cooking. Stay in the kitchen when you're frying, grilling, or broiling, and use a timer to remind you of the cooking process.
Keep Flammable Items Away
Keep dish towels, oven mitts, and paper towels away from the stovetop. Loose clothing should be tucked in to prevent accidental contact with burners.
Regularly Clean Your Appliances
Grease and food particles can accumulate on stovetops and in ovens, creating a fire hazard. Clean your appliances regularly to avoid this.
Check for Faulty Wiring
Faulty wiring in kitchen appliances can lead to electrical fires. Regularly inspect your appliances for damaged cords or outlets.
Install a Smoke Alarm
Ensure your kitchen is equipped with a working smoke alarm. Test it regularly, and replace the batteries as needed.
What to Do in Case of a Kitchen Fire
Despite your best efforts, kitchen fires can still happen. Knowing how to react quickly and effectively can make all the difference. Here's a step-by-step guide on what to do if a kitchen fire occurs:
- Stay Calm
The most critical step is to remain calm. Panic can hinder your ability to respond effectively.
- Turn Off the Heat
If a fire starts in a pot or pan, turn off the heat source immediately.
- Use a Lid or Fire Extinguisher
If the fire is small and contained, you can try to smother it by covering the pot or pan with a lid. Alternatively, use a fire extinguisher designed for kitchen fires. Always have a fire extinguisher nearby and know how to use it.
- Never Use Water
Never use water to extinguish a grease fire, as it can cause the flames to spread. It's crucial to remember this.
- Evacuate Safely
If the fire is not quickly extinguished or grows out of control, evacuate the kitchen and close the door behind you. Call 911 immediately.
- Stay Low
If the kitchen is filled with smoke, stay low to the ground, where the air is less smoky.
Preventing kitchen fires and knowing how to respond if one occurs is essential for the safety of your family and your home. By following these guidelines and staying vigilant in the kitchen, you can greatly reduce the risk of fires. Remember to have a working smoke alarm, fire extinguisher, and a well-thought-out evacuation plan. Cooking can be enjoyable and safe when you take the right precautions. Your kitchen should always be a place of warmth and comfort, not a source of danger!
A Complete Guide to the Mold Damage Restoration Process
11/16/2023 (Permalink)
 Mold damage can be a homeowner's worst nightmare
Mold damage can be a homeowner's worst nightmare. Understanding the mold damage restoration process is essential to effectively address this issue and restore your home to a safe and comfortable living space. In this blog, we provide a comprehensive guide to the steps involved in the mold damage restoration process.
1. Initial Assessment
The first step in the mold damage restoration process is a thorough assessment of the affected area. This involves identifying the type of mold, the extent of the infestation, and the underlying causes, such as leaks or high humidity. A precise assessment is essential for developing a targeted restoration plan.
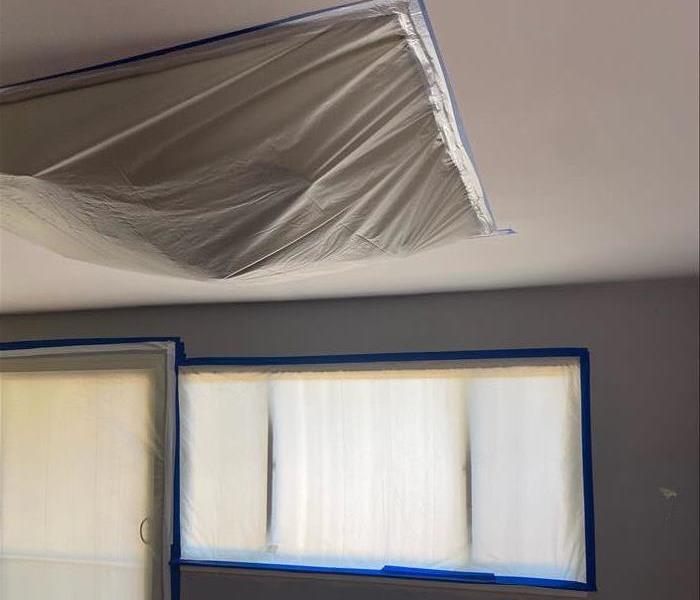
2. Isolation and Containment
To prevent the spread of mold spores, containment measures are implemented. Plastic sheeting and negative air pressure systems are used to isolate the affected area and prevent cross-contamination.
3. Mold Removal
The next critical step is the safe and thorough removal of mold from affected surfaces. Moldy materials may need to be discarded, and specialized cleaning techniques are employed to eliminate mold and its spores.
4. Air Filtration
High-efficiency particulate air (HEPA) filtration systems are used to capture airborne mold spores and particles, further preventing the spread of mold during the removal process.
5. Cleaning and Sanitizing
All surfaces and materials in the affected area are meticulously cleaned and sanitized to eliminate any remaining traces of mold and prevent its return.
6. Drying and Dehumidification
Addressing the underlying moisture issue is crucial to prevent future mold growth. Dehumidifiers and air movers are used to ensure the affected area is thoroughly dried.
7. Repairs and Restoration
If structural materials or surfaces were damaged during the mold infestation, repairs and restoration are carried out to return your home to its pre-damage condition.
8. Final Inspection
A final inspection is conducted to verify that all mold has been removed, and the property is safe for occupancy. Any necessary adjustments or additional repairs are made at this stage.
9. Preventative Measures
To ensure mold doesn't return, it's essential to address the root causes of the infestation, such as fixing leaks, improving ventilation, and reducing humidity levels.
10. Documentation
Throughout the restoration process, detailed documentation is maintained, including photographs, moisture readings, and records of all work performed. This documentation is crucial for insurance claims and future peace of mind.
Understanding the mold damage restoration process is the first step to a successful recovery. When dealing with mold, it's essential to work with a professional restoration team like SERVPRO® of Mid-City San Diego. We have the experience, expertise, and resources to efficiently restore your property and ensure it remains mold-free. If you're facing mold damage, don't hesitate to reach out for immediate assistance!
How To Improve Your Indoor Air Quality After Water Damage
10/10/2023 (Permalink)
 Restoring indoor air quality after water damage is crucial for your well-being.
Water damage can be a distressing experience for homeowners in San Diego, but it's not just the visible damage that's a concern. Water intrusion can also compromise your indoor air quality. In this blog, we'll explore the steps you can take to restore indoor air quality after water damage in your San Diego home.
Understanding the Impact on Indoor Air Quality
Water damage can introduce a variety of pollutants into your home's indoor air, including:
Mold Spores: Moisture creates the ideal conditions for mold growth, and mold spores can easily become airborne and spread.
Bacteria and Pathogens: Contaminated water can carry harmful bacteria and pathogens, posing risks.
Dust Mites: Increased humidity levels can promote dust mite populations.
Steps to Restore Indoor Air Quality After Water Damage
Ensure Safety
Before tackling air quality restoration, ensure your safety by turning off electrical power if necessary and wearing appropriate protective gear.
Remove Standing Water
The first step is to remove standing water and moisture. Use pumps, fans, and dehumidifiers to expedite the drying process.
Address Mold and Mildew
Mold and mildew can thrive in damp conditions. Inspect your home for visible signs of mold and mildew and address them promptly through professional remediation.
Ventilation
Increase ventilation by opening windows and doors, and using fans to circulate air. Good airflow helps remove pollutants from your indoor environment.
Dehumidification
Maintain indoor humidity levels below 50% to discourage mold, bacteria, and dust mites. Use dehumidifiers if necessary.
Clean and Disinfect
Clean and disinfect surfaces thoroughly to remove contaminants. Use appropriate cleaning agents to ensure effective disinfection.
Air Purification
Consider using air purifiers with HEPA filters to trap airborne particles, including mold spores and bacteria. Ensure your HVAC system has a clean filter.
Professional Assistance
In severe cases of water damage, it's wise to seek professional assistance. SERVPRO® of Mid-City San Diego specializes in water damage restoration and indoor air quality improvement.
Restoring indoor air quality after water damage is crucial for your well-being. While you can take several steps on your own, for the most effective and thorough restoration, consider enlisting the expertise of professionals like SERVPRO® of Mid-City San Diego. Our team has the knowledge, experience, and equipment to address water damage and its impact on indoor air quality, ensuring your home is safe and comfortable once again. Remember, prioritizing indoor air quality is a significant step in the recovery process after water damage.
Essential Roofing Maintenance and Repairs for Storm Resilience in San Diego
9/17/2023 (Permalink)
Welcome to SERVPRO of San Diego's blog! We're here to provide you with expert insights to help you fortify your property against the challenges of nature. In this blog, we'll delve into crucial tips and strategies for enhancing your roof's resilience to storms in the beautiful city of San Diego. A strong roof is your best defense against the elements, so let's dive in!
1. Regular Roof Inspections: Your First Line of Defense
Regular roof inspections are the cornerstone of storm resilience. Schedule professional inspections at least twice a year, preferably in spring and fall. Look out for:
Shingle Condition: Replace any cracked, curled, or missing shingles to prevent leaks and water damage.
Flashing Integrity: Ensure that flashing around chimneys, vents, and skylights is tightly sealed to prevent water infiltration.
Gutter Maintenance: Clean gutters and downspouts to prevent water buildup that can lead to roof damage.
2. Reinforce Roof Structure: Strengthening for Severe Weather
Invest in reinforcements to help your roof withstand San Diego's occasional severe weather:
Roof Bracing: If your area is prone to strong winds, consider professional roof bracing to enhance structural integrity.
Hurricane Straps: Install hurricane straps to securely anchor your roof to the walls, minimizing the risk of detachment.
3. Seal Vulnerabilities: Waterproofing is Key
To enhance storm resilience, proper waterproofing is essential:
Seal Cracks and Gaps: Regularly inspect your roof for cracks and gaps, sealing them with appropriate materials to prevent water intrusion.
Waterproof Membranes: Consider applying waterproof membranes to vulnerable areas like flat roofs to prevent leaks.
4. Trim Trees and Overhanging Branches: Preventing Impact Damage
San Diego's storms can bring down branches and debris. Trim trees around your property to avoid:
Impact Damage: Falling branches can puncture your roof during a storm, leading to significant damage and leaks.
Clogged Gutters: Prevent debris from accumulating on your roof and in your gutters, reducing the risk of water pooling.
5. Emergency Repairs: Be Prepared
No matter how well-prepared you are, emergencies can still occur. Know how to perform basic emergency repairs:
Temporary Patching: Learn how to temporarily patch a leak to minimize damage until professional help arrives.
Secure Loose Items: Secure loose shingles or roofing components that might detach during a storm and cause further damage.
6. Professional Help: Storm Damage Restoration Experts
In the aftermath of a severe storm, it's crucial to seek professional assistance:
Swift Response: Contact storm damage restoration experts like SERVPRO of San Diego to assess and address any storm-related issues promptly.
Thorough Inspection: Professionals can identify hidden damage that might not be immediately apparent to homeowners.
Incorporating these tips into your roofing maintenance routine will help fortify your home against San Diego's weather. A resilient roof is an investment in the long-term protection of your property and the safety of your family.
For comprehensive storm damage restoration and expert roofing repairs in San Diego, trust the skilled professionals at SERVPRO. Contact us today to ensure your home is ready to face whatever nature throws its way.
How to Put Out a Grease Fire: A Guide to Swift and Safe Actions
8/2/2023 (Permalink)
A grease fire can be a terrifying and dangerous situation, but knowing how to respond quickly and effectively can help prevent the fire from escalating. In this blog, we'll provide you with essential steps to put out a grease fire and protect yourself and your surroundings from harm.
Stay Calm and Act Fast
The first and most important rule when dealing with a grease fire is to remain calm. Panic can lead to hasty decisions and potentially worsen the situation. Act swiftly but thoughtfully to minimize the risk. Immediately turn off the heat source, whether it's a stovetop burner or an oven. This will help prevent the fire from growing larger and spreading further.
Use a metal lid or baking sheet to cover the flames. Without access to oxygen, the fire should smother and die down. Avoid using glass lids or plastic covers, as they can melt or break under high heat.
Smother the Fire with Baking Soda or Salt
If covering the flames isn't possible or doesn't work, use baking soda or salt to smother the fire. Sprinkle a generous amount directly onto the flames, aiming for the base. These substances can help extinguish the fire by depriving it of oxygen.
If the fire is not under control or is spreading rapidly, use a class B fire extinguisher to safely put out the flames. Aim at the base of the fire and sweep the extinguisher from side to side until the flames are extinguished. Ensure that you are using the correct type of fire extinguisher for grease fires.
Water should never be used to extinguish a grease fire, as it can cause the flames to spread and create an explosion-like reaction. Similarly, flour is also not recommended, as it can ignite and make the fire worse.
Call for Emergency Assistance
If the flames are not quickly and effectively extinguished, it is crucial to call emergency services right away. Ensure you provide accurate information about the situation and follow any specific instructions they give.
If the fire becomes unmanageable, grows beyond control, or you are unable to put it out, prioritize your safety and evacuate the area. Alert others in the vicinity and follow the designated evacuation procedures.
Knowing how to put out a grease fire is crucial for preventing injuries and minimizing property damage. By staying calm, quickly turning off the heat source, covering the flames, using baking soda or a fire extinguisher, and calling for emergency assistance when needed, you can effectively combat a grease fire and keep yourself and those around you safe. Remember, safety should always be your top priority, and if a situation becomes unmanageable, it's better to evacuate and seek professional help.
Signs of a Shower Leak: How to Detect and Address the Problem
7/13/2023 (Permalink)
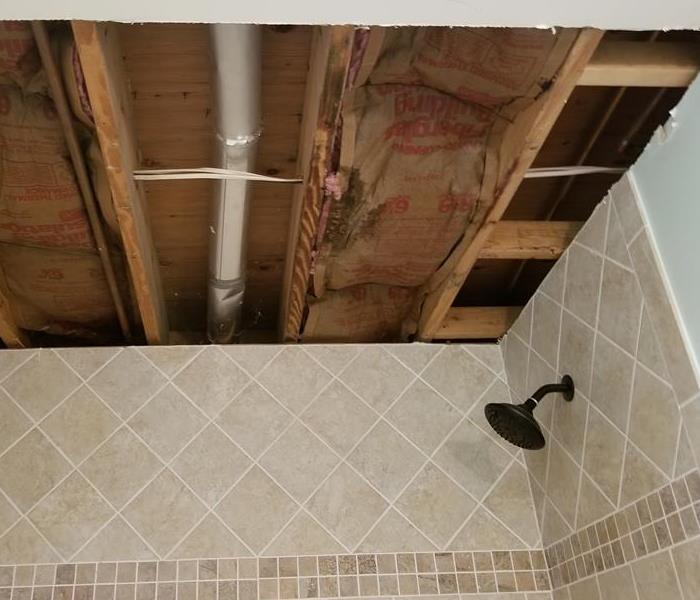 Detecting a shower leak early can prevent water damage to your home or business.
A shower leak can cause extensive damage if left undetected and untreated. It not only leads to water wastage but can also result in structural issues, mold growth, and increased utility bills. Identifying a shower leak early on is crucial to prevent further damage and the need for costly repairs. In this blog post, we will discuss common signs that indicate a shower leak, helping you take prompt action and resolve the issue before it escalates.
Damp or Discolored Walls and Floors
One of the primary signs of a shower leak is the presence of dampness or discoloration on the walls and floors surrounding the shower area. If you notice water stains, peeling paint, or bubbling wallpaper, it is likely an indication of water infiltration from a leak.
Excessive moisture from a shower leak creates an ideal environment for mold and mildew growth. If you notice mold or mildew developing on the walls, ceiling, or grout lines in your bathroom, it could be a sign of a hidden shower leak. Pay attention to musty odors as well, as they often accompany mold growth.
Loose or Damaged Tiles
Water seeping through a shower leak can cause tiles to become loose or damaged. If you notice any tiles that are cracked, loose, or coming off the wall, it may be a result of water damage caused by a leak. Inspect the grout lines as well, as deteriorated or missing grout can indicate water penetration.
Spongy or Soft Walls
When water infiltrates the walls due to a shower leak, it can cause the paint to peel, bubble, or become discolored. Keep an eye out for these signs, especially near the shower area or on adjacent walls.
If you press against the walls surrounding the shower and they feel spongy, soft, or give in under pressure, it indicates moisture damage caused by a leak. Moisture weakens the structure of the wall, causing it to lose its rigidity.
Increased Water Bill
A sudden spike in your water bill without any significant changes in water usage patterns can be an indication of a hidden shower leak. Monitor your water bill closely and investigate further if you notice an unexplained increase.
Visible water pooling or puddles on the bathroom floor, even after you have used the shower, suggests a leak. Ensure that there are no other sources of water causing the pooling, such as a dripping faucet or an overflow issue.
Water Stains on the Ceiling or Lower Levels
If your shower is located on an upper floor, water from a shower leak can travel downwards and cause stains on the ceiling or walls of lower levels. Check for water stains or discoloration on the ceiling below the shower area.
What to Do If You Suspect a Shower Leak:
- Inspect the shower area carefully for any visible signs of leaks or damage.
- Check the caulking and grout around the shower, ensuring they are in good condition.
- Test the showerhead, faucets, and valves for any signs of dripping or leakage.
- Consider hiring a professional plumber or contractor specializing in water leak detection to perform a thorough inspection if you are unable to identify the source of the leak.
- Promptly address any identified issues by repairing or replacing damaged components, such as caulking, grout, or shower fixtures.
Detecting a shower leak early on is crucial to prevent further damage and avoid costly repairs. By paying attention to signs such as dampness, discoloration, mold growth, loose tiles, peeling paint, soft walls, increased water bills, water pooling, or stains on lower levels, you can identify a shower leak and take prompt action. It is important to address the issue promptly by repairing or replacing damaged components to mitigate any potential damage and ensure the integrity of your bathroom. Remember, if you're uncertain about the source or extent of the leak, it's best to consult a professional to accurately diagnose and resolve the problem.


 24/7 Emergency Service